Tuesday, November 30, 2010

Cashew Nut Cookies

Recipe adapted from Small Small Baker

(I halved the recipe and made slight changes)

Ingredients:
50 g
Butter
30 g
Sugar
½ tsp
Pure vanilla extract
¼ (about 14 g)
Egg
20 g
Cashew nuts, grounded
90 g
Plain flour
10 g
Corn flour
¼ tsp
Baking powder


Topping:
1
Egg, seperated
68
Cashew nuts, halved


Method:
  1. Cream butter and sugar till pale and creamy.
  2. Add in pure vanilla extract. Add in egg slowly. Beat until well-mixed.
  3. Fold in grounded cashew nuts. Fold in sifted flours and baking powder gradually. Knead to form dough.
  4. Roll the dough into 3/4 cm thickness. Cut the dough into crescent shapes (or any shape you like) and place them on the baking tray. Brush a layer of egg white on the cookies and top each cookie with one halved cashew nut. (Brushing egg white helps the cashew nut to stick to the cookie well.) Brush a layer of egg yolk on top of the cashew nuts for a nice golden brown color.
  5. Bake at 180C for about 15 minutes till light golden brown. 

Notes:
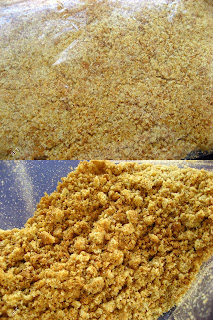
  1. I baked the cashew nuts before I “grind” it (I just pound it with a rolling pin – too lazy to take out and clean the blender afterwards).
  2. My Mum said the cookies are sweet (but my aunts said they are just right) – will reduce sugar the next time I bake this to suit my family's taste.
This is a great recipe; I can see why it is Small Small Baker’s favorite. Definitely a keeper.

Wednesday, November 24, 2010

Scalded-Dough Method


Finally tested out the 'scalded-dough' method. I also made a batch using the 'sponge and dough' method just to compare.

Recipe for the 'scalded-dough' method shared by Precious Moments

Ingredients:

(A)

100 g
Bread flour
70 g
Boiling water


(B)

300 g
Bread flour
100 g
Plain flour
80 g
Caster sugar
6 g
Salt
20 g
Milk powder
9 g
Instant yeast


(C)

175 ml
Water
60 g
Egg (1)


(D)

60 g
Butter (cubed)


Method:

  1. Add the boiling water in (A) into the flour, stir and mix to form a rough dough. Cover dough and set aside to cool. Leave to chill in fridge for at least 12 hours.
  2. Place ingredients in (B) in a mixing bowl. Mix well. Make a well in the centre, and add in ingredients in (C). Add just enough water to form a rough dough (may use less/more water, depending on weather). Knead in scalded-dough.
  3. Transfer dough to a lightly floured work surface. Knead the dough till smooth. (About 10 minutes)
  4. Knead in the butter in (D). Continue to knead the dough until it no longer sticks to your hand, becomes smooth and elastic. (About 15 - 20 minutes)
  5. Place dough in a lightly greased mixing bowl, cover with cling wrap and let proof in room temperature for about one hour, or until double in bulk.
  6. Remove the dough from the bowl; punch out the gas by kneading lightly for a few times. Divide the dough into 60g portions. Form dough into smooth rounds, leave to rest for 10 - 15 minutes.
  7. Shape and fill the buns according to recipe. Place all finished buns on a baking sheet, lightly cover with cling film, and let it proof for about 45 minutes, or until double in size.
  8.  Brush top with egg wash. Bake in preheated oven at 190 deg C for 15 minutes or until golden brown.

The 'sponge and dough' method
 
Clock wise: Ugly faces with cranberry cream cheese filling, mulberry buns, close-up of cranberry cream cheese buns, and plain buns.

To me, there are no significant differences between the two methods but when I asked my family, they managed to come up with a few differences. o.O I thought the buns tasted the same, looked the same, felt the same - just made with different method...guess not...
Here's the comparison:

Scalded-dough Method:
  1. Have to prepare the scalded-dough overnight.
  2. Dough is easier to handle/knead - less sticky.
  3. According to Sis, the buns are "sticky" on the next day (could be my egg wash) but still very soft and fluffy.
  4. Less/no yeasty flavor.
Sponge and dough Method:
  1. Longer proof time.
  2. Dough tend to be sticky.
  3. Slightly fluffier and less dense texture.
  4. More fragrant (yeasty flavor).
Even on the third days, the buns (from both methods) are still soft and fluffy.

I don't particularly favor any of the methods I tried so far. To me, the results are not significantly different but my family prefer the 'sponge and dough’ method - according to them, the buns are more fragrant and fluffy. I guess I'll stick to whatever my family likes.

If you do notice any differences in the end products of (any) method or general opinions, do share with me. =D

Saturday, November 20, 2010

Oreo Muffins

Recipe from here

Ingredients:

1 ¾ cups          flour
¼ cup              sugar
1 tbsp              baking powder
½ tsp               salt
1/3 cup            cold margarine or butter
                    egg
1 cup               milk
16                   OREO cookies, coarsely chopped (about 2 cups)

Preparation:

PREHEAT oven to 400°F (200 C degree). Mix flour, sugar, baking powder and salt in medium bowl. Cut in margarine with pastry blender or 2 knives until mixture resembles coarse crumbs.

BEAT egg and milk with wire whisk until well blended. Add to flour mixture; stir just until moistened. Gently stir in chopped cookies. Spoon evenly into 12 greased or paper-lined medium muffin cups.

Easy and simple. Baked it for my nephews and shared some with my colleagues - they enjoyed it. =D

Thursday, November 18, 2010

Aspiring Bakers #1 Change of plan...

Apparently things are not going my way lately, in this case, my baking.


I planned to bake a chocolate chiffon cake and join the Aspiring Bakers #1: Chiffon Cakes (Nov 2010) hosted by Small Small Baker (please support and join =D – for the wonders of chiffon cakes!!!). I choose a simple flavor – chocolate, what could go wrong? It’s simple and it’s (usually) always delicious.

I used my usual chiffon cake recipe. Everything went smoothly until it got into the oven. Halfway through baking, I noticed that the cake did not rise as fast as my previous ones. I had a sense of foreboding. By the end of the baking process, the cake had rose but it was not as tall and it felt more heavy and dense. After leaving it to cool, the cake shrunk horribly.
I thought it was because I over-fold the batter, or perhaps too little water, or too much flour or…maybe it was because I forgot about the baking powder. =.=”

I didn’t like the “shortie” and I refuse to acknowledge it as a chiffon cake. (It tasted great, though). I decided to be cruel and played around with “shortie”.

"Shortie"
The end product...
Whipped cream with chunks of oranges. Gave some to my friends and they loved it.
Perhaps I'll have better luck (more like better memory) next time.

Wednesday, November 17, 2010

Everything goes wrong...

But somehow ends up alright....


Was planning to make a cheesecake for Mum's birthday but since we already bought one for her, I decided to play with the ingredients…and it was disastrous – well, it was a disaster during the process (I added what I have and what I think would work). The result was surprisingly good though. Mum love the taste and even said it was almost as good as the store-bought one. Almost. I gave the rest to my friends and they love it too. The creamy cheese and hint of green tea flavor. If only I can remember the recipe…


And meanwhile, the cake that took the cake...
From RT Pasty House (Subang Jaya)
Pretty small in size. Taste good, Mum enjoyed it.

Friday, November 12, 2010

It's weekend!

Some meals we had last weekend.

Sukiyaki


 Bibimbap
And simple prawn fried rice for lunch during work day.


And at the garden....
The cherry tomatoes I planted. Peach-like shape tomato. xD
The trees are drying up (and I am losing interest >.<) so this is the last batch of tomatoes before I "kill" them. I shall miss those days where I talked to them as I weed the evil wild grasses and watered them, or the times I stood outside in the heavy rain with an umbrella just to make sure they are okay when they were babies. xD

Will post up my baked stuff once I feel "not-so-lazy". Have a nice weekend, everyone.

-Slacks away-

Wednesday, November 10, 2010

Green Tea Buns (Sponge and Dough Method)


Recipe adapted from 'The World of Bread' by Alex Goh

Ingredients:

(A)  Sponge Dough
2 tsp      Instant yeast
2 tbsp    Water
420 g     Bread flour
½ tbsp   Sugar
220 ml   Cold water

(B)  Main Dough
120 g    Plain flour
60 g      Bread flour
1 tsp     Instant yeast
110 g    Sugar (I reduced to 70 g sugar)
10 g      Salt
20 g      Milk powder
40 ml    Cold water
1           Egg
60 g      Butter (used about 40 g) didn't want to open a new pack >.<
2 tbsp   Green tea powder


Method:
  1. For the sponge, mix instant yeast and water and set aside for 10 minutes. Add the remaining ingredients (A) and knead to form dough.
  2. Cover the dough with clear film and let it proof for 2 ½ hours. Then, add the sugar, salt, eggs from the main dough ingredients (B). Mix till well blended. Then add flour, instant yeast, milk powder and the water.
  3. Mix all ingredients till well blended. Knead to form a dough.
  4. Add the butter and knead to form a smooth and elastic dough.
  5. Mould it into a round and cover it with cling film. Let it prove 10 minutes.
  6. Shape and fill buns according to recipe. (I divided the dough into 60 g portions – got about 19 buns)
  7. Place the finished buns on baking sheet and lightly cover with cling film. Let it proof for another 60 minutes or until dough double in size.
  8. Egg wash the dough. Baked in preheated 190 C for about 12 to 15 minutes, or until golden brown.


Hot dog buns, green tea cream cheese buns, Nutella filled buns, and plain buns.

For the hot dog buns, I forgot to let it proof for another hour after shaping them. >.< It was good but less fluffy compared to the other buns.

I wanted to try the 'scalded-dough' method but Sis likes bread made using this method, maybe I should secretly use the other method and tell her it is the 'sponge and dough' method. Wonder what she will say then. Hehehe. Guess I will find out this weekend.

Monday, November 8, 2010

Daiwa Sushi @ Tsukiji Fish Market (2010)

On our second trip to Tsukiji Market, we decided to try Daiwa Sushi and we were so glad that the queue at Daiwa was moving faster. Suprisingly though, both Daiwa Sushi and Sushi Dai have less people than usual (even the queue at Sushi Dai wasn't that long). Anyways, were got in line, waited a few minutes, and we are in! Sis was so happy.

Ordered the "Omakase" set. If I am not mistaken, it is cheaper than Sushi Dai but there are less sushi.

Saturday, November 6, 2010

Sushi Dai @ Tsukiji Fish Market (2009)

We heard this place is a MUST when you visit Tsukiji Market. We arrived there about 7 am...it was raining...and despite all that...there were lots of people queueing. My sister saw the queue and she was like, "Let's go to the other store with less queue (refering to Daiwa)", and I insisted on Sushi Dai. And so we wait...and wait and wait...for more than 2 hours. Sis was ready to throw a tantrum. xD Luckily we had a "light" meal before heading out. Hahaha.


We placed our order before entering - there's someone out there to take the order and asked the number of people in your party as you approach the entrance. We ordered the "Omakase" sets - 11 pieces of nigiri sushi (1 piece of your choice at the end of the set) and 1 maki sushi. But of course you can order more once you are in there - which we did.


Thursday, November 4, 2010

In search of good banana oat muffin recipes...

I don't remember where I got the recipe from but the result wasn't so great, so I am not posting up the recipe. The muffins are too dry and not much flavor (should have added more mashed bananas -sighs-).


The white bits are the roll oats.
The muffins taste better when it is hot. Despite the not-so-great taste, all 12 muffins were consumed within a day. o.O

Anyone with good banana oat muffins recipe to recommend? =D


And here's the green tea I used for my green tea chiffon cake

Wednesday, November 3, 2010

Green Tea Chiffon Cake

Ingredients:

80 g     all-purpose flour
½ tsp   baking powder

4          egg yolks
10 g     sugar
A pinch of salt
30 ml   water
30 ml   vegetable oil
1 tbsp  milk
2 tbsp  green tea powder

4          egg whites
50 g     sugar
¼ tsp   cream of tartar

Methods:
1. Beat egg yolks, sugar, and salt until light. Add water, oil, milk and green tea powder. Mix well.

2. Add in flour and baking powder. Mix until well incorporated. Set aside.

3. In another clean bowl, whisk the egg whites until foamy then add cream of tartar. Whisk until soft peak then gradually add in sugar. Whisk until stiff peak.

4. Using a rubber spatula, fold in 1/3 of the whites into the green tea batter until well incorporated. Gently fold in the rest of the egg whites by half.

5. Pour the batter into the chiffon mold. Tap the mold lightly to get rid of any trapped air bubbles in the batter.

6. Baked in preheated oven at 170 C degree for 45 – 50 minutes or until a skewer inserted into the center comes out clean.

7. Remove from the oven and invert the mold immediately. Let cool completely before unmolding.


Notes:
1. I forgot about the oil and only realized it after I fold in 1/3 of my egg whites. Added the oil, mix well, then fold the rest of the egg whites into the batter. Cake turned out okay.

2. Strong green tea flavor and color.

3. Despite the usual sugar amount, Sis and I felt that it taste very sweet. Not sure if it is because the green tea flavor.

4. May omit the milk - just put about 45 ml of water. Or you can add more milk but that will definitely affect the green tea flavor.

5. I left the chiffon cake to cool inside the oven with the door slightly open. The cake turned out better - less wrinkly surface. (see pic)