Showing posts with label cheese. Show all posts

Friday, August 19, 2011

Non-Bake Oreo Cheesecake


Non-Bake Oreo Cheesecake
Recipe adapted from Small Small Baker
(Recipe halved)
Ingredients:

Biscuit base:
50 g
Oreo cookies, cream removed
25 g
Butter, melted

Cream cheese filling:
½ tbsp
Gelatin powder
35 g
Water
130 ml
Whipped cream, whipped (medium peak)
125 g
Cream cheese
20 g
Icing sugar
30 ml
Milk
½ tbsp
Maple syrup (or honey)
¼ tsp
Vanilla extract
5
Oreo cookies, chopped coarsely

Topping (optional):
Finely crushed Oreo cookies

Method:

Biscuit base:
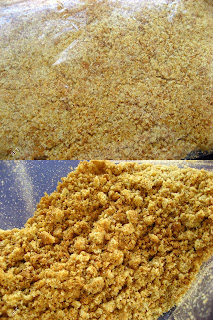
1.     Crush (or blend) the cookies as fine as possible.
2.     Combine with melted butter and press firmly into a springform tin.
3.     Chill it for at least 2 hours.

Cream cheese filling:
1.     Measure water into a bowl and sprinkle in gelatin (don’t stir). Set aside to allow the gelatin grains to swell (10 minutes) before setting the bowl over a pot of simmering hot water. Stir with a spoon and once the gelatin melts, remove the bowl from the pot and set aside to cool to room temperature.
2.     Beat cream cheese with icing sugar till well combined.
3.     Add in fresh milk and mix till well combined. Add in gelatin mixture and mix well.
4.     Fold in whipped cream and divide mixture into 2 portions.
5.     Fold in crushed Oreo cookies into 1 portion and maple syrup (or honey) and vanilla extract into the other portion.
6.     Pour in the white portion into the chilled biscuit base. Level the cream cheese filling and put into the fridge to let it set.
7.     Pour the Oreo cream cheese filling onto the set white cream cheese and level it.
8.     Put into the fridge to let it set for 2 to 3 hours.
9.     Remove from freezer, sprinkle Oreo cookies on top (or decorate as desire) and put back into the fridge. (None for mine because I ate them D= )
10.  Slice and serve chilled.

Nom nom~~

Also, cream corn custard whomeal buns and mini chocolate cupcakes

Tuesday, March 22, 2011

Back on track...

I was in a slump and now I am getting things back on track - blogging is one of them =D

For now, just pics of what I had baked some time ago.

Sugar-Free Banana Chiffon Cake
Whipped the egg white by hand just because I was too lazy to take out my hand mixer - I regretted it. xD
The cake is dense because I added more mashed bananas.

Sugar-Free Red Bean & Black Glutinous Rice Chiffon Cake
Soft and fluffy but subtle flavor.

Sugar-Free Cream Cheese Chiffon Cake

And...
Over-whipped whipped cream. Dx

 Our current addiction, cheese hot dog buns.

Monday, January 3, 2011

Low Fat Sugar Free Cotton Cheesecake

(What a mouthful title)
Sis requested a cotton cheesecake and she wants it low fat and sugar free.

Recipe adapted and modified from Diana’s Desserts.
(Halved the recipe)

Cotton Soft Japanese Cheesecake (Low Fat and Sugar Free Version)
Makes 1 16-cm and 1 8-cm cake

Ingredients:
130 g
Cream cheese, 1/3 less fat
20 g
Butter
50 ml
Milk, low fat
30 g
Cake flour
10 g
Corn flour
3
Egg yolks
1 tsp
Lemon juice
A pinch of salt


3
Egg whites
1/8 tsp
Cream of tartar
4 tbsp
Splenda

Method:
  1. Line the pans. Wrap the removable bottom pans with aluminum foil. (I wrapped 2 layers of foil)
  2. Melt cream cheese, butter, and milk over a double boiler. Keep stirring until the mixture is smooth. Remove from heat and set aside to cool.
  3. Sift and measure the flour. Mix the sifted flour into the cream cheese mixture until well incorporated.
  4. Add the egg yolks, lemon juice, and a pinch a salt. Mix well. Set aside.
  5. In a clean bowl, whisk the egg whites until foamy. Add in cream of tartar and continue whisking. Add the sugar slowly and continue whisking until soft peaks form.
  6. Gently fold in 1/2 of the egg whites into the cream cheese mixture. When combined, fold in the remaining egg whites.
  7. Pour the batter into the prepared pans.
  8. Bake in a water bath at 160 degree C for 1 hour or until set.
  9. Remove the cake from the mold immediately and let it cool.
Reusable foil! <.<

The mini one. A slice the size of tablespoon.Nom nom.
The 16-cm one, after chilling in fridge overnight.


Notes:
  1. Halfway through baking, the top got really brown so I had to tent the cake with a foil. I read some blogs on how we are not suppose to open the oven’s door but it can’t be help in this case D=. I even had to turn the cake for even baking. >.<
  2. I removed the smaller one from the oven earlier (it baked for around 40 minutes).
  3. The taste: cheesy (of course it is not as rich as full fat cream cheese, but good none the less), soft, fluffy, and light.
  4. If chilled in fridge, the texture is denser but it is still soft and spongy. After a day, the cheese flavor is more pronounce.

Sis loved it, but she only had one slice – her will to resist temptations never fails to amaze me. Mum and I…no such will (don’t think we have one), we polished off the rest of it with cups of coffee (caffeine-addicts). Luckily I made smaller portion. -.-;;

Friday, December 10, 2010

Lazy Week~~

Matcha Chiffon - I craved for it and decided to make it in the middle of the night
Bread & Buns - my family members' weekly request


Wednesday, November 17, 2010

Everything goes wrong...

But somehow ends up alright....


Was planning to make a cheesecake for Mum's birthday but since we already bought one for her, I decided to play with the ingredients…and it was disastrous – well, it was a disaster during the process (I added what I have and what I think would work). The result was surprisingly good though. Mum love the taste and even said it was almost as good as the store-bought one. Almost. I gave the rest to my friends and they love it too. The creamy cheese and hint of green tea flavor. If only I can remember the recipe…


And meanwhile, the cake that took the cake...
From RT Pasty House (Subang Jaya)
Pretty small in size. Taste good, Mum enjoyed it.

Monday, October 4, 2010

Cream Cheese Chiffon Cake


I love baking chiffon cakes, mainly because everyone in my family enjoys eating it.

My Dad only eats chiffon cakes and sponge cakes (usually the type we consider “traditional” cake). My Sis is a picky eater and she watches what she eats but whenever I bake chiffon cakes, she is sure to eat them. My nephews love chiffon cakes too – one of them gobbled up almost half of the cake. O.O
As for Mum, she loves and eat everything I baked (she’s my tester – though I think she is too nice to say anything bad about my baking)

All of us love the soft fluffiness of the cake. My Sis and Dad says that chiffon cakes are light and they like the “airiness” of the cake, thus they won’t feel “jelak” (cloy) after eating more than a slice.

I had been baking pandan chiffon cake for the past few weeks but since I have some cream cheese left, I decided to try the "Cream Cheese Chiffon Cake" that I copied from Beachloverkitchen long ago.'

Saturday, September 25, 2010

Cream Cheese Tarts

Had a few blocks of cream cheese left in the fridge (bought a lot when it went on sale) and I decided to make some cheese tarts (one of my Mum’s favorite). Browsed through my collection of recipes and found a few recipes for cheese tarts. I simply pick one to try. Not sure where I got the recipe from…if anyone seen the same/similar recipe, do tell me, so I can credit that person.

The recipe makes about 20 tarts but since Mum is the only one that eats cheese tarts in the family, I halved the recipe.

Original recipe:


Ingredients

Tart shell

Butter                  120 g (I used less butter)

Sugar                   60 g (I reduced the sugar used)

Egg yolk              1

Superfine flour     250 g


Cream cheese filling

Cream cheesecheese      180 g

Butter                             20 g (I used less butter)

Caster sugar                   30 g

Egg                                1

Lemon juice                   ½ tsp (omitted)


Methods

Tart Shells

1.      Cream butter and icing sugar until light and fluffy, add yolk, and finally add flour. Knead the dough by hand.
2.      Scale the dough and divide it.
3.      Push the dough using hand evenly to the mould. Then, make holes at the base using a fork.
4.      Bake at 180 degrees for 10 minutes or until golden brown.
5.      Gently tap the mold to release the shell and leave it aside to cool completely.
  
I get 8 tart shells from the recipe.

I think I made the tart shells a bit too thick.

Cream Cheese Filling

  1. Cream cheese, butter, and sugar until smooth and fluffy, add egg and continue to beat till smooth.
  2. 1Then, add lemon juice. Mix well. (I added a teaspoon of milk)
  3. Fill the tarts with the cream cheese and add a little jam of choice. Draw using a toothpick.
  4. Bake in 180 degrees for 10 minutes.
  5. Remove and leave it to cool. Refrigerate for 2-3 hours.


I did not have enough cream cheese filling but I was too lazy to make more.

I added strawberry jam.
I fail at making nice swirly patterns.

Sunday, September 19, 2010

Bacon, Egg, and Cheese Scones


I was “cleaning up” my picture folders and I found the pictures of the ‘Bacon, Egg, and Cheese Scones’ that I made back in the States. It was delicious and hearty, perfect for breakfast. And so, I would like to share the recipes that I found for these savory scones.

When I think of scones I usually think of them being sweet, not savory. But one morning, when my sister was eating the cranberry scones I made, she said something like, “Wouldn’t it be nice if I just fried an egg and some bacons and sandwiched them between the scones?”

It started giving me ideas since she said that, so I decided to search for some savory scones recipes. I just randomly typed “bacon and egg scones” and viola! Tons of recipes popped out.
So, among the many recipes, I referred to Leite’s Culinaria and King Arthur’s recipes.

I modified the recipes to suit our taste and also to make it less fat/calorie (or so I hope).

Original recipe of ‘Bacon, Egg, and Cheddar Scones’ by Leite’s Culinaria
Original recipe of ‘Bacon-Cheddar-Chive Scones’ by King Arthur Flour

My modified version (not highly recommended):

Ingredients

2 cups              all-purpose flour

1 tbsp              baking powder

1 tsp                salt

2 tsp                sugar

Pepper to taste (may omit if you don’t like pepper)

3 tbsp              butter, cubed and cold

1 cup               mozzarella cheese, shredded (2% fat)

3 large             eggs, scrambled and broken up into pieces about 1 inch square
                        (I used Egg Beater)

6 strips             bacon, cooked and cut into pieces about 1 inch square (about 1 cup)
                        (I used Turkey bacon)

3/4 cup            milk (or just enough to form a dough)

Method

1.      Preheat oven to 425 F degree ( 210 C degree). Line baking sheet with parchment.
2.      Mix the flour, baking powder, salt, sugar, and pepper together. Stir them until they are well mixed.
3.      Cut the cold butter into the flour mixture until the mixture resembles coarse breadcrumbs.* Do not  overmix.
         You can do this using pastry blender, two knives, your hands, food processor, or stand mixer.
4.      Mix in the shredded cheese, scrambled eggs, and bacon pieces till evenly distributed.
5.      Add in half of the milk first, stir to combine. Keep adding until a dough is formed (no crumbs left at the bottom of the bowl). The dough will be sticky and chunky.
6.      Transfer the dough to a well-floured surface. Pat the dough into a smooth rectangle, about 1 inch thick. Cut the dough into 6 portions.**
7.      Place the scones at least 1 inch apart on the prepared baking sheet.
8.      Brush the scones with a bit of milk.***
9.      Bake the scones for 15 – 20 minutes, or until golden brown. Remove and serve warm.

*          Because I used less butter, my mixture usually did not turn out like coarse breadcrumbs. I always stop mixing when the butter lumps are about the size of small peas.
**        It can be in any shape (round, rectangle, square, triangle) or size you prefer
***      You can use egg wash or even heavy cream; this is just to help their crust brown.

I highly recommend everyone, especially scone-lovers, to try the original recipes. I am sure it will be delicious. (If anyone out there happens to try them, do share with me on how it turned out)

In my honest opinion, my version is not the best tasting “bacon, egg, and cheese” scones but it is a “healthier” alternative. Well, actually, it is to cut down the calories so we will feel less guilty for consuming such hearty scones. Haha. Like my Mum always said, “Things with less oil [fat] are less tasty.” And I find myself agreeing with that statement more often than not. Though I can think of a few less fat/less calories food that are more delicious…