Showing posts with label cheesecake. Show all posts

Friday, August 19, 2011

Non-Bake Oreo Cheesecake


Non-Bake Oreo Cheesecake
Recipe adapted from Small Small Baker
(Recipe halved)
Ingredients:

Biscuit base:
50 g
Oreo cookies, cream removed
25 g
Butter, melted

Cream cheese filling:
½ tbsp
Gelatin powder
35 g
Water
130 ml
Whipped cream, whipped (medium peak)
125 g
Cream cheese
20 g
Icing sugar
30 ml
Milk
½ tbsp
Maple syrup (or honey)
¼ tsp
Vanilla extract
5
Oreo cookies, chopped coarsely

Topping (optional):
Finely crushed Oreo cookies

Method:

Biscuit base:
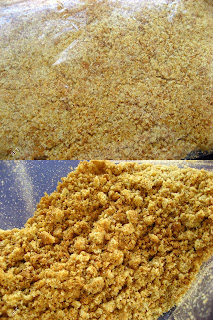
1.     Crush (or blend) the cookies as fine as possible.
2.     Combine with melted butter and press firmly into a springform tin.
3.     Chill it for at least 2 hours.

Cream cheese filling:
1.     Measure water into a bowl and sprinkle in gelatin (don’t stir). Set aside to allow the gelatin grains to swell (10 minutes) before setting the bowl over a pot of simmering hot water. Stir with a spoon and once the gelatin melts, remove the bowl from the pot and set aside to cool to room temperature.
2.     Beat cream cheese with icing sugar till well combined.
3.     Add in fresh milk and mix till well combined. Add in gelatin mixture and mix well.
4.     Fold in whipped cream and divide mixture into 2 portions.
5.     Fold in crushed Oreo cookies into 1 portion and maple syrup (or honey) and vanilla extract into the other portion.
6.     Pour in the white portion into the chilled biscuit base. Level the cream cheese filling and put into the fridge to let it set.
7.     Pour the Oreo cream cheese filling onto the set white cream cheese and level it.
8.     Put into the fridge to let it set for 2 to 3 hours.
9.     Remove from freezer, sprinkle Oreo cookies on top (or decorate as desire) and put back into the fridge. (None for mine because I ate them D= )
10.  Slice and serve chilled.

Nom nom~~

Also, cream corn custard whomeal buns and mini chocolate cupcakes

Monday, January 3, 2011

Low Fat Sugar Free Cotton Cheesecake

(What a mouthful title)
Sis requested a cotton cheesecake and she wants it low fat and sugar free.

Recipe adapted and modified from Diana’s Desserts.
(Halved the recipe)

Cotton Soft Japanese Cheesecake (Low Fat and Sugar Free Version)
Makes 1 16-cm and 1 8-cm cake

Ingredients:
130 g
Cream cheese, 1/3 less fat
20 g
Butter
50 ml
Milk, low fat
30 g
Cake flour
10 g
Corn flour
3
Egg yolks
1 tsp
Lemon juice
A pinch of salt


3
Egg whites
1/8 tsp
Cream of tartar
4 tbsp
Splenda

Method:
  1. Line the pans. Wrap the removable bottom pans with aluminum foil. (I wrapped 2 layers of foil)
  2. Melt cream cheese, butter, and milk over a double boiler. Keep stirring until the mixture is smooth. Remove from heat and set aside to cool.
  3. Sift and measure the flour. Mix the sifted flour into the cream cheese mixture until well incorporated.
  4. Add the egg yolks, lemon juice, and a pinch a salt. Mix well. Set aside.
  5. In a clean bowl, whisk the egg whites until foamy. Add in cream of tartar and continue whisking. Add the sugar slowly and continue whisking until soft peaks form.
  6. Gently fold in 1/2 of the egg whites into the cream cheese mixture. When combined, fold in the remaining egg whites.
  7. Pour the batter into the prepared pans.
  8. Bake in a water bath at 160 degree C for 1 hour or until set.
  9. Remove the cake from the mold immediately and let it cool.
Reusable foil! <.<

The mini one. A slice the size of tablespoon.Nom nom.
The 16-cm one, after chilling in fridge overnight.


Notes:
  1. Halfway through baking, the top got really brown so I had to tent the cake with a foil. I read some blogs on how we are not suppose to open the oven’s door but it can’t be help in this case D=. I even had to turn the cake for even baking. >.<
  2. I removed the smaller one from the oven earlier (it baked for around 40 minutes).
  3. The taste: cheesy (of course it is not as rich as full fat cream cheese, but good none the less), soft, fluffy, and light.
  4. If chilled in fridge, the texture is denser but it is still soft and spongy. After a day, the cheese flavor is more pronounce.

Sis loved it, but she only had one slice – her will to resist temptations never fails to amaze me. Mum and I…no such will (don’t think we have one), we polished off the rest of it with cups of coffee (caffeine-addicts). Luckily I made smaller portion. -.-;;

Friday, December 3, 2010

Mini Cheesecake


Recipe based on Alex Goh's "Baked Marble Cheesecake" (Creative Making of Cakes)

Halved the recipe and made them in Texas-size muffin cups. Added a biscuit base because my Mum likes it.

Modified recipe:
Make 7 Texas-size muffin cups

Biscuit Base:
90 g
Digestive biscuits
40 g
Butter

Combine finely ground biscuit crumbs and melted butter. Press the mixture firmly into the bottom of muffin cups. Set aside till needed.

Filling:
(A)
250 g
Cream cheese
10 g
Sugar

(B)
120 g
Whipping cream

(C)
2
Egg yolks

(D)
60 g
All purpose flour

(E)
Zest
1/2 lemon

(F)
2
Egg whites
50 g
Sugar
1/2 tsp
Lemon juice
 
Method:
  1. Whipped (B) until soft peaks.
  2. Cream (A) until light and fluffy.
  3. Add (B) and cream until smooth.
  4. Add (C) and cream until well blended.
  5. Add (D) and (E), mix until well combined. Set aside.
  6. In a clean bowl, whip the egg whites (F) until foamy. Add the remaining ingredients, continue to whip until soft peaks form. (Do NOT beat till stiff peaks - it will be difficult to incorporate with cream cheese mixture)
  7. Thoroughly mix the egg white with the cream cheese mixture.
  8. Pour the cream cheese filling into the muffin cups.
  9. Bake cheesecake in a waterbath at 150 degrees C (300 F) for about 60 minutes or until set and golden brown. Remove from oven and let cheesecake cool completely.
Cracks D=
Notes:
1. If possible, remove the cheesecake from the muffin pan immediately.
2. Maybe serve after cool or leave it to chill it in fridge. (Mum said it taste even better on the next day)

Wednesday, November 17, 2010

Everything goes wrong...

But somehow ends up alright....


Was planning to make a cheesecake for Mum's birthday but since we already bought one for her, I decided to play with the ingredients…and it was disastrous – well, it was a disaster during the process (I added what I have and what I think would work). The result was surprisingly good though. Mum love the taste and even said it was almost as good as the store-bought one. Almost. I gave the rest to my friends and they love it too. The creamy cheese and hint of green tea flavor. If only I can remember the recipe…


And meanwhile, the cake that took the cake...
From RT Pasty House (Subang Jaya)
Pretty small in size. Taste good, Mum enjoyed it.

Tuesday, September 21, 2010

Long Long Ago...

Just pictures of what I had made long long time ago...

I remember I made this after Halloween...'Leftover Halloween Candy Cookies'. Not sure where I got the recipes from.
Most of the candies did not made it into the cookies...I ended up eating most of them during the process.
The easy way.
Made this with Pillsbury Biscuits  (oh...how I miss all the easy-bake stuff)
Was testing a butterless sponge cake recipe....It turned out good but I lost the recipe. D=
My first swiss roll attempt.
Whipped cream with red bean filling.
The "sponge cake" was lacking...Perhaps that's the reason I did not keep the recipe for it.
My first steam buns.
Had to steam it with makeshift steamer.
Rather ugly looking. But I WAS pleased with it.
Now that I look back at it...I should really try to make steam buns one of these days...better looking ones hopefully.
(Any steam buns recipes to recommend? I would love to try them out =D )
Souffle Cheesecake. It was a Japanese recipe that I painstakingly transalated but I lost it. D=

I remember that it tasted very good. Strong cheese flavor as the eggs' flavor were not overpowering. But the method was definitely different from most souffle-type cheesecake. (Lots of work >.<;)

Tuesday, September 14, 2010

Choux Pastry and the Ugly Cheesecake


Recipe from Do What I Like

Ingredients
(makes 8 puffs) (I made 14 small puffs)
85ml water
50g butter (I used only about 40g of butter because that is all I got left)
pinch of salt
1/4 tsp sugar
1/4 tsp vanilla essence
50g bread flour
20g cake flour
2 eggs (lightly beaten)

Method:

1.       Cook water, butter, sugar and salt in a saucepan till bubbling hot. Turn the heat to low.
2.      Add in the flour mixture in one go and mix with a wooden spoon till a dough is formed.
3.      Still on low heat, cook the dough for 1 - 2 minutes till a thin white film is formed at the bottom of the saucepan.
4.      Transfer dough to a mixing bowl and beat till it is lukewarm.
5.      Add in egg by thirds and mix till well blended and smooth.
6.      Place batter into piping bag and pipe it onto a lined pan in rounds of about 5cm in diameter. Spray some water on it.
7.      Bake at 200C for 25 minutes then 180C for 8 - 10 minutes or till dry and golden brown in color. Turn off the oven and let it cool in the oven for 30 minutes.


I wanted to make the choux pastry “crispier”, so I left it to bake for a longer period of time. But I think they were over-baked because I forgot about them – left them to bake longer than I intended to.
My family prefers the softer texture choux pastry because they felt that this “crispier” (almost burnt) choux pastry is dry and too hollow inside. Does that even make sense? I am not too sure myself because I’ve never been a fan of cream puffs and did not eat much of them. Thus, I am not even sure if that is how it is suppose to come out or taste like.


I also baked a ‘Feather Light Cheesecake’ for my friend. I got the recipe from Jessie Hearty Bakes (original recipe from Alex Goh). Unfortunately, mine did not turn out as pretty as hers.
My oven’s temperature must have been too high – look at the hideous surface. D=


I decided not to give my friend because it looks so ugly but she showed up with a big container and insist on having it. She said that the cake is spongy, soft and …well, light. She would love it better if the cheese flavor is a little bit stronger but overall, she likes the cake.
I will have to try to make the cake again and taste it!